- Navigate to your Automation Account and select the runbook you would like to schedule. In this case I am select the testloop runbook.

- Select the runbook and then select the “Add webhook” option on the top ribbon bar.

- Enter the Name of the webhook and copy the URL. You must copy the URL at this point as once the webhook has been created it can no longer be viewed!

- Now that the webhook has been created, we’ll need to create the Scheduler. Navigate to the “All Services” blade.
- Start typing “Scheduler” in the search field and the option for “Scheduler” will appear. Select “Scheduler Job Collections” and then select the “Create” button at the bottom of the page.

- On the Scheduler Job blade, enter the name of the job and select “Job collection” to create a new collection. Select “+ Create New” and proceed to fill out the “New Job Collection” properties.
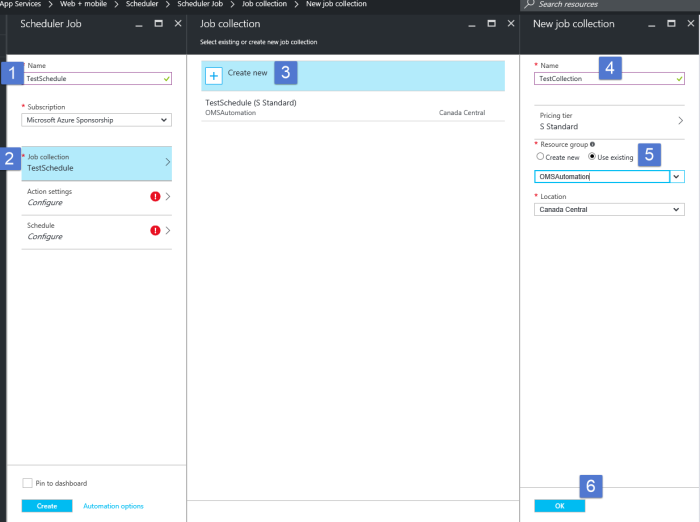
- Next select “Action Settings”. On the “Action settings” blade enter the Action, Method, and Url (see below). The Url is the webhook URL copied from step 3 above. You do not need to fill in the other data.

- Lastly, select “Schedule” and configure the scheduling options. Notice under “Recur every” we can now select minutes. Much better!

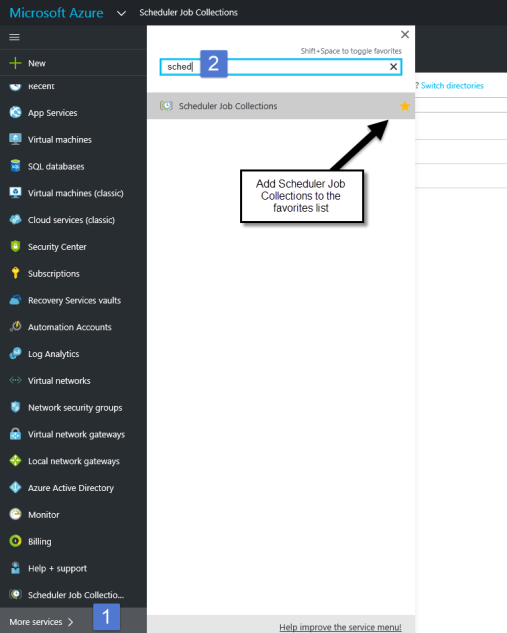
- Once you select the “Create” button, the Job Collection is created. At this point we can navigate back to the main menu, select “More Services”, and start to enter “Scheduler” in the search field. You will see “Scheduler Job Collection” appear. Favorite “Scheduler Job Collections” and select to navigate to the “Scheduler Job Collections blade.
- The “Scheduler Job Collection” blade provides in-depth detail about the job status, history, properties, and more.

- To verify that the runbook is executing as expected, navigate back to the “Automation Account” blade and select “Jobs”. You should see your job executing every 5 minutes.

